The image below represents AWicons main working window. The following
instructions will walk you through the creation of a new project, either an icon or a cursor.
To create a new project, simply launch AWicons a new icon project will be created automatically. The Program is now ready to work with!
First, let's look at the program interface (main tools and windows) and adjust some options.
Main editor window (toolbars are not shown)
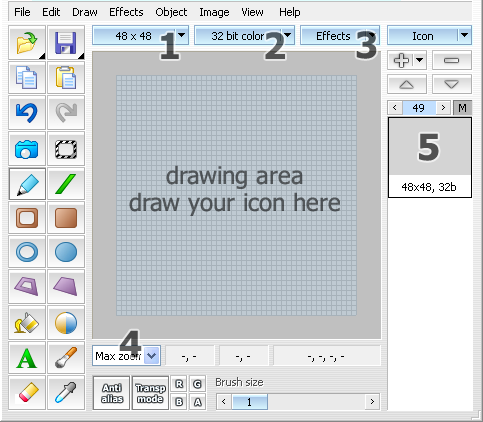
This is the main window you will work with. It opens automatically when the program launchs. The largest part of this window is occupied by the drawing area, permitting direct icon drawing (use built-in tools to draw). The drawing area may be zoomed in or out simply by using the Zoom list box (4) or keyboard the shortcuts: "+" to zoom in, "-" to zoom out. The Zoom list box (4) contains predefined settings.
When a new project has been started, a new icon blank file (size: 48x48 and 32-bit color) will be created automatically by default. To change the icon size or color depth use buttons (1) and (2) accordingly.
To add a new icon image format, that is different in size or color depth, simply click on the "+" button and select the desired size and color mode for this new image.
Then, a new icon image format will be added. All created icon images are listed to the right of the drawing area (5).
Deleting icon images is as simple as adding them: just select an icon image to be deleted in the list (5) and click on the "-" button on the toolbar. You are able to delete or apply some effects (e.g. Brightness Intensity Contrast etc.) to several icon images at the same time. To toggle between icon images use "arrow up" and "arrow down" buttons on the toolbar.
Next, we'll take a look at the program toolbars that you will work with.
To create a new project, simply launch AWicons a new icon project will be created automatically. The Program is now ready to work with!
First, let's look at the program interface (main tools and windows) and adjust some options.
Main editor window (toolbars are not shown)
This is the main window you will work with. It opens automatically when the program launchs. The largest part of this window is occupied by the drawing area, permitting direct icon drawing (use built-in tools to draw). The drawing area may be zoomed in or out simply by using the Zoom list box (4) or keyboard the shortcuts: "+" to zoom in, "-" to zoom out. The Zoom list box (4) contains predefined settings.
When a new project has been started, a new icon blank file (size: 48x48 and 32-bit color) will be created automatically by default. To change the icon size or color depth use buttons (1) and (2) accordingly.
To add a new icon image format, that is different in size or color depth, simply click on the "+" button and select the desired size and color mode for this new image.
Then, a new icon image format will be added. All created icon images are listed to the right of the drawing area (5).
Deleting icon images is as simple as adding them: just select an icon image to be deleted in the list (5) and click on the "-" button on the toolbar. You are able to delete or apply some effects (e.g. Brightness Intensity Contrast etc.) to several icon images at the same time. To toggle between icon images use "arrow up" and "arrow down" buttons on the toolbar.
Next, we'll take a look at the program toolbars that you will work with.
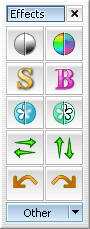
- Effects toolbar: it lets you add different effects to your icon image.
Most frequently used effects are accessible directly from the toolbar. Other effects
may be selected using "Other" button. Using AWicons built-in effects,
you may give your icons a unique look. We will go into all of the effects here.
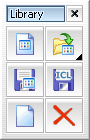
- Library toolbar: allows you to manage icon libraries. With the help of the
toolbar buttons, you can create a new library, save the icon sequence as a
library, open existing or built-in libraries and add or delete icons from the library.
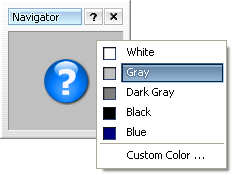
- Navigator: previews the current state of the selected icon. You are able
to preview an icon on different backgrounds. To change a background color,
double-click inside the Navigator window and then select a color.
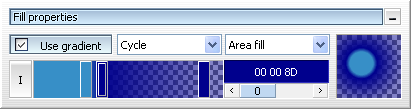
- Fill properties: includes gradient and fill properties. You can adjust
fill properties and change the gradient mode and colors here. Read the "Using
gradients and transparency" lesson for a more detailed overview.
- Launch AWicons and adjust your working space (locate toolbars, drawing area zooming)
- First, create one icon image format (size: 48x48, color mode: 32-bit), AWicons allows you to create other formats based as well.
Action: select 48x48 using (1) button and set 32-bit color mode with the help of (2) button.
Then you are able to create any other icon formats that you want. To add a new icon format, use the "+" button on the toolbar.
- Begin drawing an icon with the help of the built-in tools or ue an existing image.